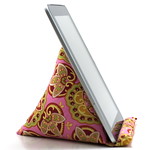
Buy PodPillows!


Categories
Archives
Branches Bag

I don’t know if you find this to be true, but it seems it’s nearly impossible to find cheery women’s clothing in the winter. All sweaters (long-sleeved, of course – none of this short-sleeved sweater nonsense that goes on in stores right now) are nothing but dark and boring colors. Ryan makes fun of me because when he looks in my closet, all he sees are greys, blacks, dark reds, purples, and other drab colors.
Anyway, I made this bag for myself, since I need something to go with my darker winter clothing and jackets. Perfectly utilitarian and suits both brown and black clothing for the dark winter months.
Here’s the inside:

I think the cheery blue saves it from being altogether too dark, don’t you?
The good news in all of this is that today is the shortest day of the year. It’s only going to get brighter and better from here! Happy Solstice!
Posted by robyn on December 21st, 2009 under crafts | 7 Comments »
Banjo Snowmeter

It snowed last night. The first real snow of the winter here. How much?
The Banjo Snowmeter says: Belly high and still snowing.
Perfect day to build a fire in the wood stove, hole up in the craft room, and try my hand at the Oh, Fransson’s Map of the States block tutorial with my new Hope Valley fabric.
Wherever you are – snow or not – I hope you are having a lovely, cozy day.
Posted by robyn on December 20th, 2009 under banjo, random | 1 Comment »Hope Valley!

Well hello there! It’s been a while since I’ve had much craftiness to share, but I’m now officially on vacation from work for a couple of weeks, and I am crossing my fingers that the desire to hunker back down in the craft room returns with a vengeance. I’ve just not been feeling it lately for some reason. Anyway, a recent arrival in the mail has prompted me to get back on the quilting bandwagon in the upcoming days.
It’s an entire fat quarter pack of Denyse Schmidt’s Hope Valley line! I’ve never bought a fat quarter pack of any kind, so this is a first for me. I am always so unplanned about my fabric purchases, and I often find that by the time I get around to actually buying parts of a fabric line, it’s gone out of stock. As many of you fabric junkies know, once it’s out, it’s Out. That is, unless you feel like taking out a second mortgage on your home to give to that eBay seller who has jacked up the price of your favorite line months later. (I guess that’s like the equivalent of sports ticket scalpers, but instead, it’s fabric scalpers… Either way, they obviously plan their purchasing much better than I do!)
I think this is what causes the hoarding mentality, and I’ve totally fallen prey.
Anyway, Hope Valley is pretty, isn’t it? I think there’s some quilting in my future. The pink/orange colorway is my favorite! Which is your favorite?


Tutorial: Make your own vanilla extract in 8 easy steps

OK, so I was so enticed by all the information I found on making your own vanilla, that I couldn’t wait and decided to make my own ASAP. It’s remarkably simple and I think it will yield a great lot of vanilla that’s much cheaper and better than what you can buy in the store. Here’s a picture tutorial on how to make your own!
You will need:
- 1 airtight bottle
- 3 vanilla beans
- 1 cup of vodka, preferably 100 proof
- About 6 weeks of waiting :-/
1) Buy some vanilla beans.

I’d suggest finding them online. I checked the grocery, and two itsy bitsy vanilla beans would cost $8.99. I got thirty Madagascan beans from the Boston Vanilla Bean Company for $37.50, since this is what they recommend for extract. (If you bought that many at the supermarket, it’d be $134.85! Seems like a great deal to me…)
2) Check out your new beans.

I’d never actually seen/touched/used a vanilla bean before this project. When they arrived, I was surprised that they were really long, kind of thin, and most surprising of all, they were moist. They were packed in an airtight plastic bag and then tube, so they didn’t dry out on their way to me. When I opened them? HEAVEN. They smelled so, so good!
3) Split the top of the beans down the middle.

Conventional wisdom says that the more exposed the substance you’re trying to make extract from, the quicker and stronger the process will be. So, take 3 beans from your stash, and cut the top with a knife down the middle. [Side note: yes, that’s a coconut macaroon in the background. I made them just before the vanilla. You might notice them disappearing during the making of this tutorial 🙂 What?!? I was hungry!]
4) Open up the vanilla beans

If this is your first vanilla bean experience, you might be surprised at what you find. I know I was. First, your fingers grow to an enormous size! Just kidding. Actually, the part I didn’t expect is that the inside is quite moist and grainy, full of the black vanilla specks you might think of when you think of good french vanilla ice cream. At least, that’s what I think of! It’s fairly messy and gets all over your fingers if you’re not careful.
5) Cut the opened vanilla beans into ~1″ pieces


6) Break out the vodka!

When I arrived at the liquor store, I was confronted with row after row of vodka, all priced and branded differently. Luckily, I went to the yuppie liquor store next to the Whole Foods, where the staff is friendly, knowledgeable and probably very well-versed in which wines to pair with your Pennsylvania bailey hazen blue artisanal cheese or your Muscovy duck confit. Thankfully, the guy that works there also knows about extracts (doing this at home might just qualify as a yuppie task, come to think of it…). He was able to help me out of my deer-in-the-headlights stare and guide me to the appropriate alcohol to do the job. Here’s what he said:
- The higher the proof, the more efficient and strong the extract. That is, it extracts faster and tastes better.
- The best thing to use would be 150 proof grain alcohol (pure ethanol).
- The next best thing to use would be 100 proof vodka.
Ethanol sounded scary to me, so I went with the vodka. Plus, if I had any left over after my vanilla experience, I could actually drink it, whereas grain alcohol apparently tastes like the stuff you apply to your wounds.
I settled on the Smirnoff triple distilled 100 proof vodka. Number 57!

7) Prepare your oh-so-adorable bottle

Wash out your bottle. It can be any type of bottle or jar, as long as it has a cap (like a screw cap) or stopper like this one. I found this one at the Container Store. It holds almost exactly 1 cup of liquid, so is perfect and adorable for this task.
8 ) Fill the bottle with 1 cup of vodka and your cut vanilla beans

When this is done, feel free to eat a macaroon!
9) Shake your new vanilla extract 1x per week and wait!
This is the hardest part! The waiting, not the shaking. That said, it’s fun to shake the bottle when it’s all sealed up. You’ll see the brown specks begin to mingle with the vodka and the liquid will turn a very light amber. The mixture will darken over time. Right now it’s just barely amber, but after a while, it should darken to the luscious color of dark brown vanilla, so long as you regularly give it a good shake! I’ll try to post updates to show the progress.
So there you have it. Your own vanilla extract in 8 easy steps. I’d love to hear how yours turns out if you decide to make it!
Posted by robyn on November 25th, 2009 under cooking, crafts | 3 Comments »Make your own vanilla extract

I think my most frequently purchased baking supply, besides flour and sugar, is vanilla. It is insanely expensive, and I always feel resentful picking up a decent bottle that costs more than 10 dollars, knowing that it won’t last for very long. As a side note, it makes me even more enraged to know that the most expensive bottle is the best deal, even though it climbs up into the higher double digits. Despite knowing this intellectually, I can rarely get myself to invest in that much vanilla at one time. For some reason, I have a mental block against buying things at the grocery store that cost more than 10 dollars and only make exceptions once in a while.
It has never really occurred to me to make my own.
Jessie at The Hungry Mouse has a great picture tutorial showing how to make vanilla extract with a few vanilla beans and some vodka.
The Boston Vanilla Bean company, based here in MA, has their recipe posted online with a link to their extract-grade beans available for purchase. So far, they seem to be a quite reasonably priced place to buy vanilla beans online. An even better deal than the go-to Penzey’s, for example.
Clotilde at Chocolate and Zucchini has her own take on this as well.
The bottom line: Place 2 or 3 vanilla beans into about a cup of vodka (or rum). It seems people all do it a bit differently. Chop the beans, split the beans, or just put them in whole – there are all of these variations out there and it seems you can’t go wrong. Either way, place it all in an airtight container and let it sit for 8 weeks or so, shaking the jar once a week. Voila! Vanilla extract!
When you’re about 1/3rd through the bottle, refill to the top with vodka. Add more vanilla beans from time to time to keep the formula going.
I will do the vodka version, since it seems to be the purer version. I can’t wait to try it!
Have you ever made your own? Any experiences to impart to a newbie?
Posted by robyn on November 21st, 2009 under cooking, crafts | Comment now »Small bits of inspiration

There seems to be a lot going on right now, and at the same time, nothing at all. Does this ever happen to you? The work week has been filled with some crazy, hectic, and full days that often start with me climbing on my bike at 5:20 in the morning and not pedaling home until 7 or 8 at night. Mind you, this isn’t so bad. Many of the things that happen in the day are quite positive, but the composite week leaves me tired, both physically and mentally. The weekend days, on the other hand, are spent trying to recover, sleep in, and muster the energy to do it all over again. The result? I’ve been going to bed at ridiculously early times, leaving little time or energy for sewing or much else. Another side effect? When people ask me what I’ve been up to, I have nothing remotely interesting to tell them about.
But here are some things that have been urging me on, encouraging me from the sidelines to stay inspired and keep going. Behold some crafty goodness from the bloglands and elsewhere:

1. I know this has probably made its way around the craft blogworld 3 times over by now, but I love this pillow by Cluck Cluck Sew, and plan to partake in the joy at some point soon.

2. Felt! I love the sturdiness and warm feel of wool felt and was especially excited to see The Felt Smackdown, where the folks at American Felt and Craft declare that “4 felts will go in, and only one will emerge victorious.” A systematic look at different wool felts, even going to far to see which does best when set on fire. It is brilliant.

3. Speaking of felt, it was felt week last week at True Up (where I became wise to the Felt Smackdown). There are some great tidbits there to take a look at, including the above book – Feltique – that features the gorgeous necklace on the cover that makes me drool.

4. Pictorial Webster’s: Inspiration to Completion. Have you seen this insanely awesome video about the making of the old school Pictorial Webster’s Dictionary? If you like any of the following: letterpress, bookmaking, dictionaries, words or pictures of any kind, then it’s settled. You should watch this video. We bought a copy of the mass-produced version from Amazon.

5. Jason Mraz. I am obsessed. Especially with this extended album
, with all of its delicious acoustic takes of his catchy tunes.
Dehydrator treats

I’ve been experimenting with more dehydrator goodies. Most recently, I made the cookies pictured above from some apricots, dates, walnuts coconut, and sunflower seeds. I didn’t measure, but just put in handfuls of everything into a food processor, processed until it was pasty, made cookie-shaped balls of the paste, sprinkled with dried coconut, and then threw it on a dehydrator tray to cook for a while at 135° for a couple of hours.
It wasn’t quite right after just 2 hours. It tasted way too much like the sunflower seeds, so I dried them for about 4 more hours… All better! I think next time I’d omit the sunflower seeds altogether, since they didn’t really mesh with the rest of the flavors.
This recipe for peanut butter bites is next on my list to try.
Posted by robyn on November 15th, 2009 under cooking, crafts | 1 Comment »Pebble Tote

Melinda asked me to make her a bag… oh… about a bazillion months ago. For some reason, this one didn’t come so easily to me. I found myself with a bout of crafter’s block trying to find just the right pattern and fabric combo to suit her color requirements. I think I made three separate rounds of fabric purchases, none of which really worked out for me. But finally, I stumbled upon a combo I really love and the bag just kind of sewed itself.

It’s a big tote with ample pockets (a requirement!). And I think it could hold just about everything.

In fact, it’s got pockets upon pockets on the inside. See?

It arrived at her homestead today, and so I’m glad to be able to show it to the world without spoiling the surprise!
Posted by robyn on November 8th, 2009 under crafts, sewing | 4 Comments »Linen Wristlet

Aren’t wristlets so handy? I carry one around when I need to just bring the essentials with me: iPod, cell phone, some cash and credit cards, and of course my indispensable lip balm. I often will have one tucked in my bike pannier bag at work, since that big honkin’ thing is not really around-town stylish, you know? I also find wristlets great to have at weddings or if you go out at night and don’t want to lug everything around with you. Small, discreet, delicate, and doesn’t ruin the dress/outfit concept.
This wristlet is a cute and casual one made using some of my new favorite fabrics these days. Monaluna’s Mingle and Metro Market lines are both totally addictive lines that I just adore.

Paired with some linen it makes for a nice Spring-Summer-Fall accessory.

The inside is Monaluna’s Stepping Stones fabric from the Mingle line. Yum!
This one’s for sale at my Etsy shop!
Posted by robyn on November 2nd, 2009 under crafts, sewing | 3 Comments »New Laptop Sleeve: Scooters!

There was a time when I quite seriously contemplated buying a cute little Vespa or Honda scooter. They’re fairly cheap, and if you get one that’s below a certain engine strength (50cc), you don’t need to get a special license to ride them. It’d be a perfect commuting vehicle, is extremely earth-friendly, compact, and oh-so-cute! Perfect for short or easy errands on the weekends, and you can even park it on the sidewalk like a bike!
There are down sides, though, beginning with the fact that they’re really just fair-weather vehicles. Riding one of these suckers through rain and snow is not only unappealing, but no doubt dangerous and totally uncomfortable. And considering I’m trying my best to bike commute my way through all the good weather this year, I figured a scooter would be a conflict of interest and would likely sit idle in the garage on the nice days. So I didn’t get one.
But thankfully I can now live out some of my scooter dreams through this adorable scooter fabric. It’s a laptop sleeve for my work laptop, so I can cruise around work from meeting to exciting meeting with it snuggled in its little scootery home.

The inside is full of these cheery green polka dots.

I want to make everything out of this scooter fabric. I’m in love!
Posted by robyn on October 31st, 2009 under crafts, sewing | Comment now »Handmade High Tech

I'm Robyn. Thanks for stopping by! This is my craft blog.
Contact me at robyn [at] dognamedbanjo [dot] com.