Buy PodPillows!
Categories
Archives
Bernina 440 QE: Button Hole Tutorial
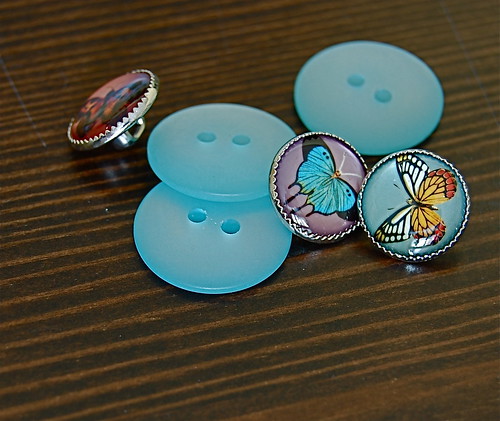
Buttonholes seem to be one of the most scoured and studied aspects of a sewing machine when seasoned pros decide to get a new machine. Is the stitch quality good? Are they easy to make? Are they consistent? If you sew clothes, its these types of finishing touches that make all the difference. Many have asked me questions related to button holes on the Bernina 440 QE, and I’ve finally decided to put together a little button hole walkthrough for the curious! Hopefully this will answer some of the questions that have been put out there. If not, please let me know – I’m probably going to do a little Q & A post in the near future. Let’s hop to it, shall we?
Getting Started
First things first. Reach into your handy accessory cabinet and pull out the Button Hole Foot – # 3A. Can you find it in this picture? It’s like a little Where’s Waldo search:
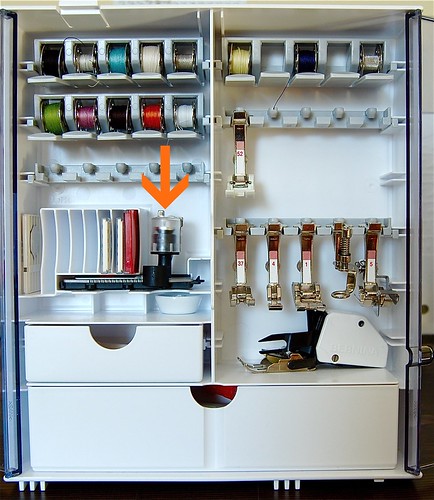
Isn't this a cute little hiding place for this strangely shaped foot? Cozily nestled among the... needles.
Let’s take a quick look at the 3A foot. The basic anatomy is pretty simple. It’s got what I’ll call a clear shoe with a little red mark that slides back and forth within the surrounding metal frame when you stitch your button holes. The frame helps you determine the length you want your button hole.
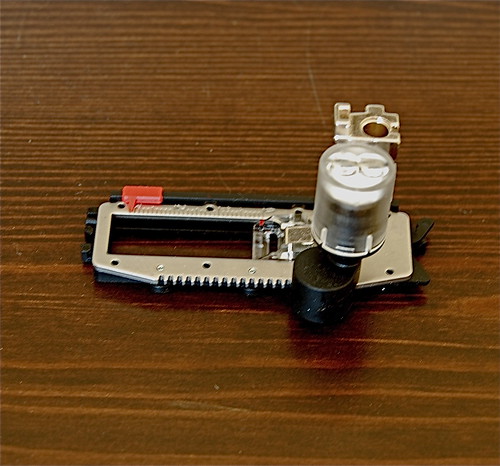
Top view of the button hole foot.

Bottom view of the button hole foot.
Notice the black gear wheel that rides along the metal teeth of the foot. This is what moves the shoe back and forth as it creates a button hole.
There are two red bits you should be aware of:
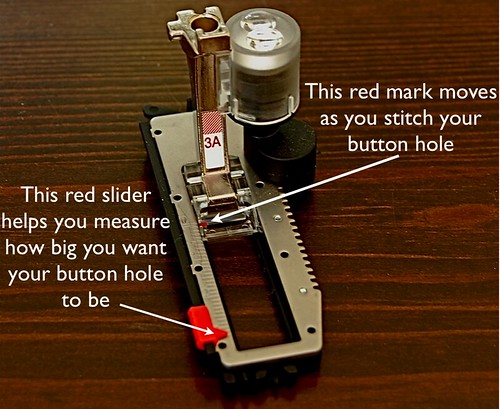
These two red pieces are essential to creating the perfect button hole!
Now that we’ve checked out the parts, place the foot on the machine.
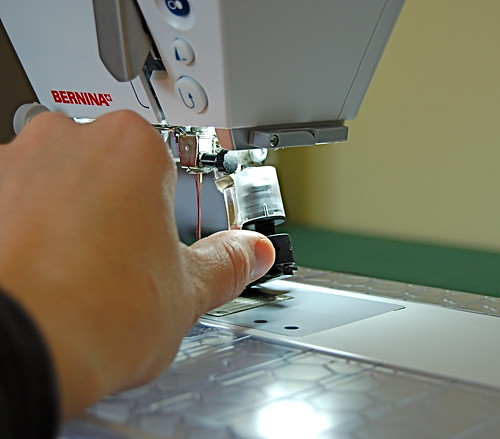
Put the foot on the machine, just as you would any other foot...
It’ll look like this when you’re done:
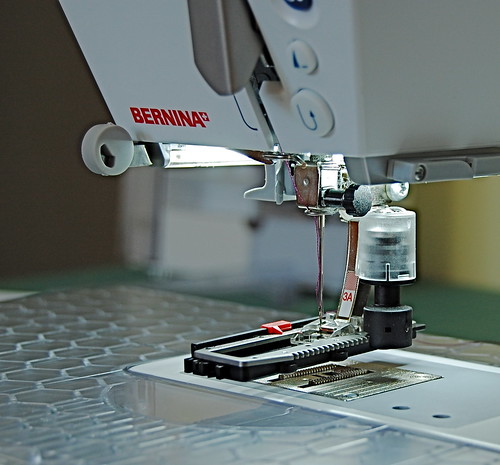
It's an odd looking beast, isn't it?
Now it’s time to thread the bobbin and the thread. I was in the dark about this little feature until after I posted the initial version of this tutorial, but thanks to some great readers, I am now enlightened! You thread the top thread like normal. The bobbin, on the other hand, has a super secret little hole that you can thread for tighter thread tension throughout the button hole experience. Looky here:

The part that sticks out on the right is called the finger. It's got a little hole up there just for your bobbin thread to go through!
So, you thread your bobbin like normal, but then once you’re done, slide that little thread through the microscopic hole on the finger (the bit that sticks out on the right). When it’s threaded properly, it’ll look like this:
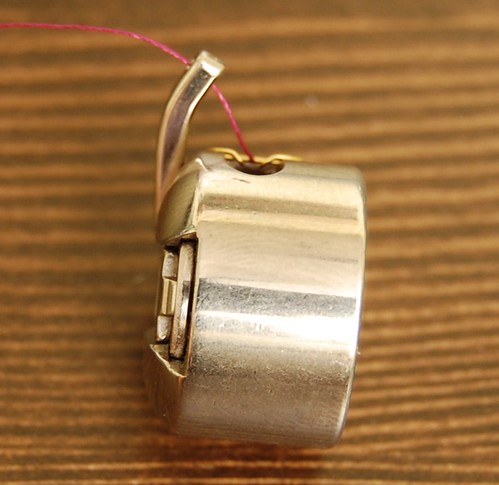
Clever, isn't it?
The hole on the finger can be used for button holes and also for doing embroidery with the embroidery module. Essentially, you can thread through the finger any time that you’d like the tension to be tighter.
First thing I do once the foot is on the machine and the machine is threaded is to pull the thread down through the foot to get a nice clean start. To do this, I hit the needle up/down button twice (needle down, then up again). Then I grab the thread from underneath:
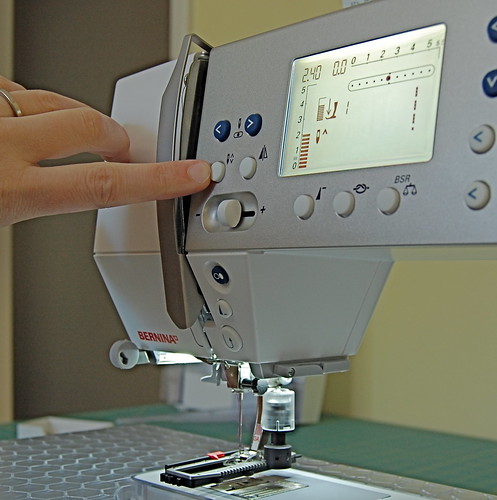
This needle up/down button is I think my absolute favorite feature of this machine. Simple pleasures, right?
Now slide something – seam ripper, scissors (closed, not open!), or a pin – underneath the foot and slide the threads out and to the back:
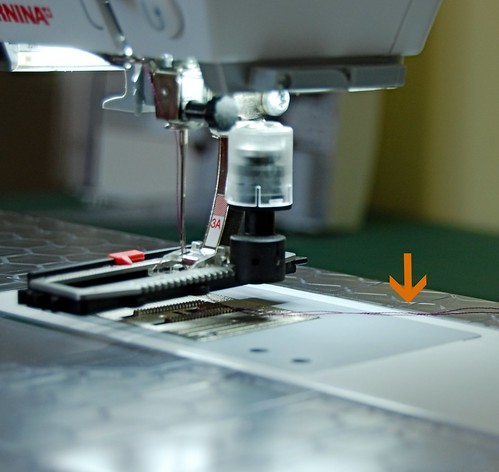
Now the top thread is through to the bottom of the foot, and the bobbin thread is pulled up and both are happily hanging out.
Making a Button Hole
Now we’re ready to get started! Our trusty stitch card says that button holes can be done with stitches 11, 12, 13, 14, 15 and 16.
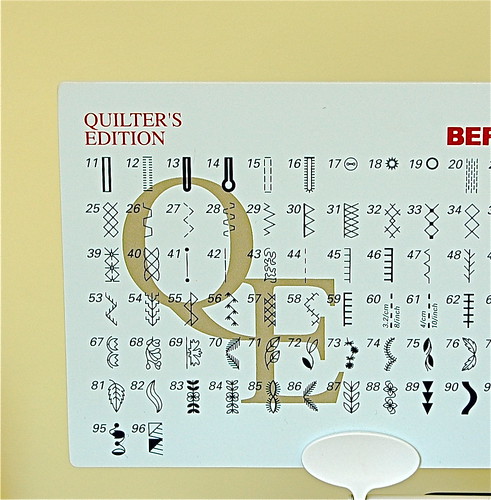
Bernina stitch card. Look at all the button hole options!
I’ll be using number 11 for this tutorial only. The rest of the button holes can be done just like the ones I do here! Enter stitch number 11 on the machine by pressing the # [triangle] key and then the one key twice (#-1-1)
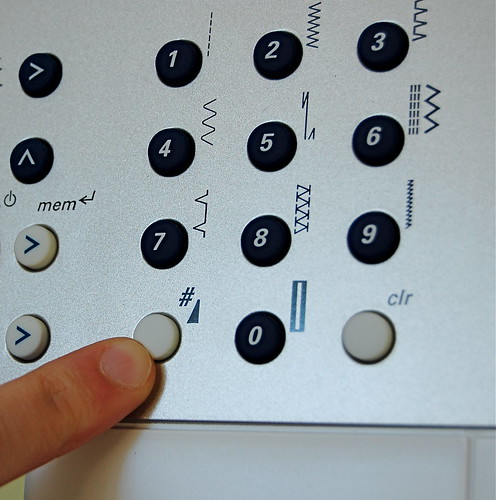
What would you call this... the Number Triangle button?
Once this is done, your screen should look like this:
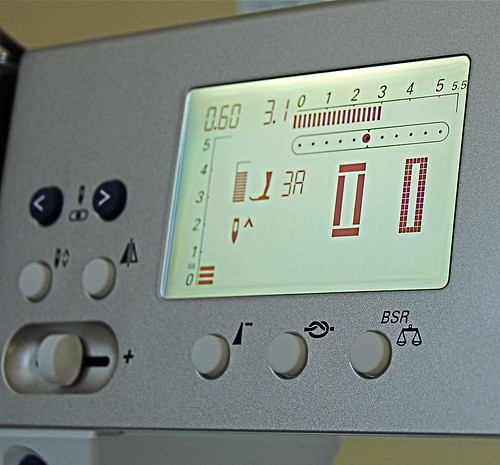
The screen, as always, has some useful information.
Notice that it’s telling us to use foot 3A. We’re done with that part already, so we’re ahead of the game! Next, notice that the stitch length (the vertical 0 – 5 scale on the left) shows three dashes and ends up at the little squiggly mark between 0 and 1. This is apparently the squiggly mark to indicate button hole stitch length. This little machine is so clever. Finally, it’ll actually show you the shape of the button hole we’ll be making.
The left vertical part of the button hole image will be blinking, indicating which part of the button hole it’s ready to sew (or in progress of sewing). We’ll come back to this diagram in a minute.
Now we’re ready to get the button in on the action after long last. Find your favorite button that you’d like to make a button hole for. The Bernina button hole foot only supports buttons that are 3 inches or less, since that’s the length of the foot. If you have a bigger button than that, I’m afraid you’re out of luck!
Place your button on top of the foot. The very top of your button should line up with the first red mark on the foot. Careful! If you have a small button, it’ll be easy for this to slide up past the red line. It’s best to hold the button in place while you measure. The little arrow on the bottom red slider should line up with the very bottom of the button.
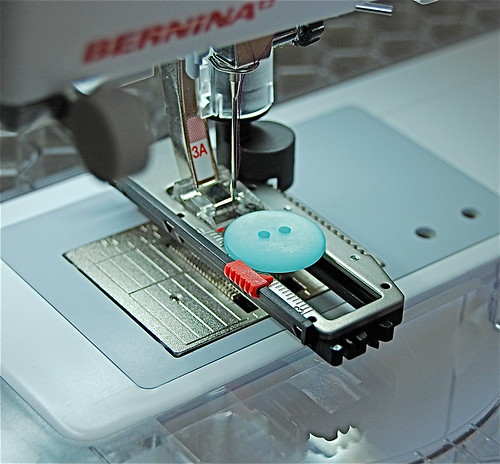
The button, in its temporary home.
Now that you’ve got the bottom slider set up properly, you can remove the button from the foot and place it aside. Its brief cameo appearance is this tutorial is officially over! From here on out, it’s all button holes, all the time.
It’s time to place your fabric underneath the presser foot and begin stitching. Begin and go slowly. Here’s how this will go down:
- Begin stitching. You’ll notice that it will begin making little zig-zag stitches that eventually make up the left side of the button hole.
- The metal frame will begin moving backward as you stitch, moving the top red line (attached to the shoe) toward the red plastic slider arrow.
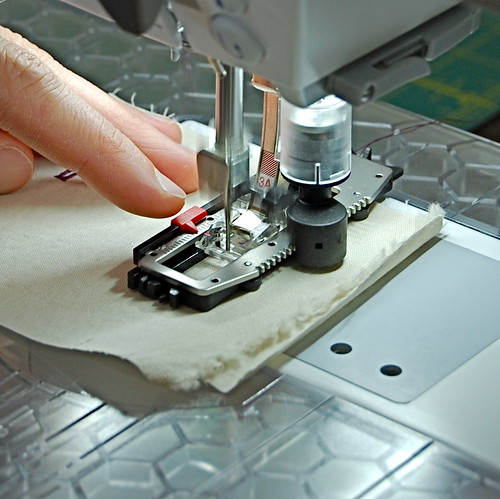
The red lines eventually meet up when the button hole is as long as it needs to be to accommodate the button of your choosing.
- Once the plastic red arrow is lined up with the red mark on the shoe, quickly hit the reverse button. Go slowly! This part can sneak up on you and can leave you feeling a little harried.
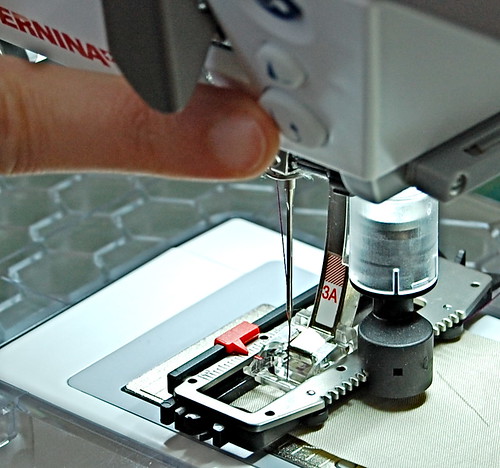
Hitting the reverse button as the two red lines meet tells the machine that you've reached the desired length for this button hole.
- This tells the machine that you’ve reached the desired length of the button hole and it’s time to finish the other sides. Don’t worry. The machine takes care of everything else from here!
- The machine will begin backtracking up on the right side of the button-hole-to-be and will continue to finish all of the remaining sides.
- The final side that it fills in is the bottom. It will zig-zag in place for a while at the bottom and then come to a rest in the up position on its own. This is similar to the motion when you end a repeat of any other stitch on the machine.
Please note! You will know that the machine is done stitching when the graphic on the screen blinks the left vertical side again. If it’s still blinking the bottom part of the button hole, you’ve got more stitching to do.
You’re done! Your button hole is now complete! Marvel at your work:

All done!
One Last Step
To realize the full potential of your button hole, you’ll have to open it up to make room for the button! Take your trusty seam ripper, insert it carefully into the fabric, taking care to not get any of the thread, and gently run it up the length of the button hole to open it up.
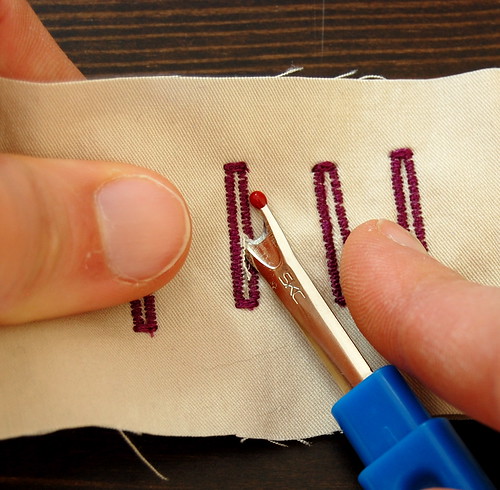
Careful! If you're too quick here and catch the threads, this could mess up all of your hard work, leading to an unraveling button hole!
The Auto Feature – How to Make More Identical Button Holes.
Once you finish your first button hole, take it out, snip the threads, make sure the button fits, and admire it. But not for long! We’ve got more work to do.
The Bernina 440 has the ability to make all subsequent button holes exactly the same length as the one you just created, using an auto-button hole feature. You would use this if you were making, say, a shirt that had 5 or 6 identical buttons. In theory, you could replicate the steps you just took, but there is room for error, specifically in terms of the timing in which you hit the reverse button to identify the length of the button hole as you are stitching. Even though I know you wouldn’t make any mistakes, Bernina makes sure you can’t when you do your next button holes. Here’s how it works.
You’ll notice that since you finished your first button hole, there is one key difference on the display. The inside of the button hole graphic on the display now shows the word “auto” where it was blank before. Check out the picture below to make sure yours does too!
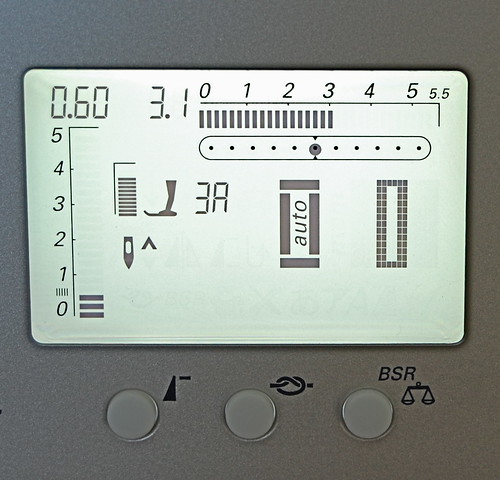
The inside of the button hole diagram now says "auto," indicating that it's ready for more automatic button hole fun.
The “auto” indication means that the Bernina is ready to make more button holes just like the one you just did – exactly the same! Little did you know it at the time, but when you did your first button hole, you were actually programming the machine, telling it just how big you wanted the current and future button holes to be. It remembered, and is ready to make more.
Now, when you place your fabric under the foot and begin stitching, it can be a hands-free affair, in which you just sit back and watch it create another identical button hole. Brilliant!
This will happen for as long as you’d like to make identical button holes. But what if you have a different vision, and all of the buttons on your shirt are different sizes? How do you get rid of the “auto” feature?
Resetting the button hole programming
If you’re ready to move on to other button hole sizes, then you need to clear out the programmed size that you told the Bernina about previously. To do this, simply hit the clear button (affectionately known as “clr” on the machine) to get rid of the auto designation and to start from scratch.
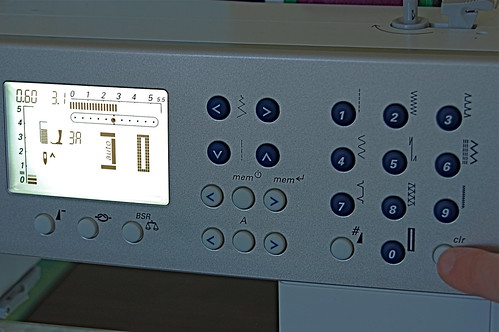
Clear out all memory of your previous button hole...
The “auto” will disappear, and you are free to start again with a brand new, differently-sized button and repeat all the steps from above.
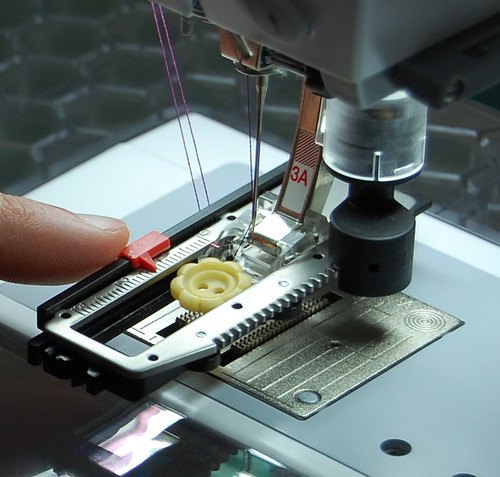
I love this wee yellow button...
Threading Comparison
Since I was in the dark for a while about the best threading technique for button holes, I decided to see if the threading through the bobbin finger really made any difference or not. Here’s my comparison shot:
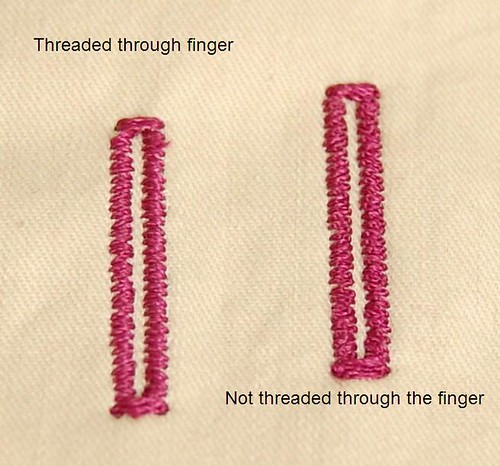
Hmmm... What's the verdict?
I guess I don’t see a huge difference. But the one on the right – not threaded through the finger – does look a tad messier, especially on the left side of the button hole. For my novice eyes, I’m not sure I’d notice from far away! Anyway, I figure I’ll still thread through the finger, since it can’t hurt!
Troubleshooting Tips
My machine doesn’t make very nice button holes!
Eek! I know how you feel. I’ve had several attempts that yielded bad button holes. Here’s what I changed to make it work:
- Try a different needle. Either sharper, or thinner, or just plain newer. I often sew with denim needles for sewing heavier layers of fabric (they are larger, thicker needles) and these seem to make pretty terrible button holes. See below:
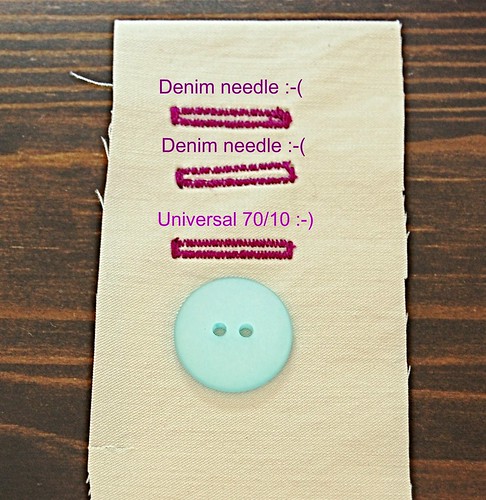
Ick! The top two button holes are made with a denim needle (it was a pretty dull one at that...). Just not as delicate as one might hope, and the stitching didn't seem so even. The bottom button hole was made with a universal needle sized 70/10. Muuuch better!
- Thread type – try changing the type of thread that you make your button holes with. I use thread designated for machine embroidery, and you typically get nicer, fuller button holes this way.
- Use a stabilizer – Try placing interfacing or wash away stabilizer beneath the fabric when you do your button hole. More delicate fabrics need structure to be useful for housing button holes.
- Give the bobbin threading a look-see and see if you’re threading through the finger.
It won’t repeat my button hole!
- If you turn off your machine after your first button hole, it will forget about your programmed button hole size.
- Don’t hit the “clr” button in between button holes.
- Don’t punch in the #-1-1 combo again after you make your first button hole. The machine will stay on the button hole stitch for as long as you like.
————————————————————-
Update: Some of you have experienced some issues making buttonholes. Specifically, several of you have said that you get through the first half of the buttonhole with no issues, but when you hit the reverse button, the buttonhole just keeps stitching backwards and never stops. While this hasn’t happened to me, I have found a few tips from here and there to remedy this behavior:
- Something’s dirty and preventing it from “seeing” what it needs to. Remove the throat plate, remove any fuzzies. Also, at the top of the buttonhole attachment, atop the clear cylinder, there are two round glass parts that look like mini magnifying glasses. Clean those off. Some have had success after performing these steps.
- The buttonhole attachment is out of calibration. Apparently, your dealer can calibrate the buttonhole attachments, but I don’t think that we customers are able to do this on our own on the 440QE (I think you can do this on the 800 series yourself, though. A good reason to upgrade! 🙂 ). I don’t know what the actual process of calibration entails, so I’m not even sure what to try at home.
- If calibration doesn’t do the trick, then I’ve read that it’s likely that the buttonhole attachment itself needs to be replaced. Having your dealer try another buttonhole attachment would help you know if that were the case.
- If replacing the foot doesn’t work, then it could be the sensor above the foot, cables between the sensor and the S-Print (main processor control board on the front panel), or the S-Print itself. Your dealer can help to troubleshoot this!



October 27th, 2015 at 9:38 am
Thank you!!! You saved my sanity and a Halloween costume. I was ready to drop kick the Bernina tutorials!! They came out perfectly!!
July 28th, 2016 at 8:57 am
Thank you for a most enlightening tutorial It’s so easy once one knows how
August 15th, 2016 at 4:42 am
Thanks! I just wanted to let you know that seven years later, your posts are still helpful and relevant. I have had my 440 for eight years, and had not needed it for button holes. So you saved my bacon when I was trying to finish a back to school dress on a Sunday afternoon when my local Bernina shop was closed. Thanks so much!!!
October 23rd, 2016 at 6:41 pm
Would much rather have someone talk me thru it
October 27th, 2016 at 7:56 am
Perfect … excellent detail!
December 3rd, 2016 at 11:36 am
thank you so much
December 30th, 2016 at 9:35 pm
Thank you thank you thank you. I was beside myself as I thought that I would finish off a garment today which had been sitting around for a couple of months. Tried to use the buttonhole program on my Aurora 440 QE but it simply would not work – stitched the first 2 beads and it just continued on stitching the 2nd bead without sewing the other sides of the buttonhole. I did a google on problems with Aurora buttonholes and came across your tutorial.
I cleaned the throat plate per your suggestion 1 above and it worked! I had visions of needing to take my machine to a mechanic but cleaning the plate did the job!!! I am one happy seamstress!!
January 26th, 2017 at 9:09 pm
Thank you so much for the brilliant tutorial on buttonholes. i have never managed to get this function to work. The instruction book was no help and neither was my local dealer was disinterested. I have run off four perfectly matching buttonholes. Have owned my Aurora440 for six years. Will be visiting your site for help and inspiration again
January 27th, 2017 at 11:36 am
Your instructions work. Manual did not!
July 3rd, 2017 at 5:37 pm
Very easy to follow – thank you.
July 10th, 2017 at 3:48 pm
Great instructions! If you are a quilter be sure to change your stitch plate before doing this.
September 30th, 2017 at 9:32 pm
I can’t thank you enough for this terrific tutorial! I have had my 440QE for about 8 years and this is the first time I’ve used the buttonhole foot! I was always scared of it! I have produced 2 perfect buttonholes today. Not first time I might add … the little glass magnifier needed cleaning (the troubleshooting was brilliant for this). Thanks again!
October 19th, 2017 at 8:50 am
Thanks for all the great info. I have problems trying to sew a buttonhole on the collar stand of shirts (in particular, men’s shirts). Because of the bulk in a very small area, and there isn’t a lot of fabric for the foot and feed dogs to hold on to, I often have to unpick a half-done buttonhole which has bunched up stitches. Can you suggest anything?? Thanks.
January 13th, 2018 at 12:11 pm
Sooooo appreciative of your wonderful instruction! Bernina handbook =worthless and it was such a long time since I made buttonholes. Really needed a refresher! Thanks!!