Buy PodPillows!


Categories
Archives
Tiny Protoquilt
Here’s a small project that uses the amazing Bernina Stitch Regulator (BSR). It’s a tiny protoquilt: something a little bigger than a coaster, much, much smaller than a regular quilt, and even smaller than my original protoquilt. This would be a great first project for trying out the BSR, or something small and fun for the experienced quilter, too! In this tutorial, you’ll also learn how to use a stencil for your free-motion quilting design. It’s a fun technique to try if you don’t yet feel comfortable or artistic enough to do free motion designs.
Materials
Here’s what you’ll need to make one roughly like mine:
- 10-15 2 1/2″ wide by ~1.5 – 2″H pieces. Scraps work great for this!
- Some solid fabric of your choice for the quilt top. I’m using two strips: one that is about 2″ x 6 1/2″, one that is 1 3/4″ x 6 1/2″ and one piece that’s 6″ x 6.1/2″
- One larger piece for the back of the quilt – about 14″ x 6 1/2″
- One piece of batting – about 14″ x 6 1/2″
- Double-fold binding. You can also use pre-packaged bias tape, if you’d like.
- Thread that roughly matches your solid fabric (or another color of your choice!)
- A stencil (optional)
- Quilt Pounce or a chalk pencil (optional)
Note: If you don’t have a stencil, you can use a chalk pencil and your own design, drawn by freehand, if you wish!
Creating the Patchwork Strips
1) First, cut out a bunch of blocks that are 2 1/2″ x a between 1 and 3 inches tall. The height is up to you.
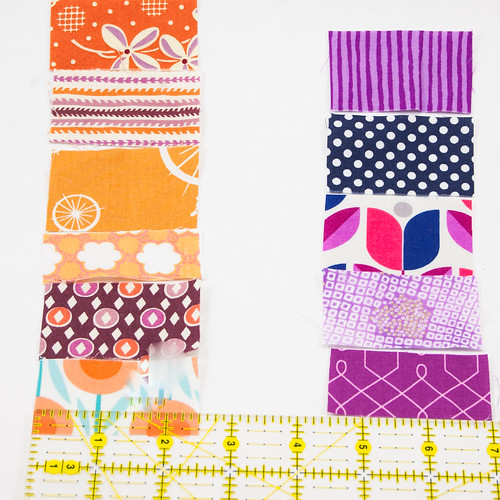
The end goal is to get two strips of patchwork that are 2 1/2″ W and 6 1/2″ H when finished. Sew your patches together on the 2 1/2″ edges.
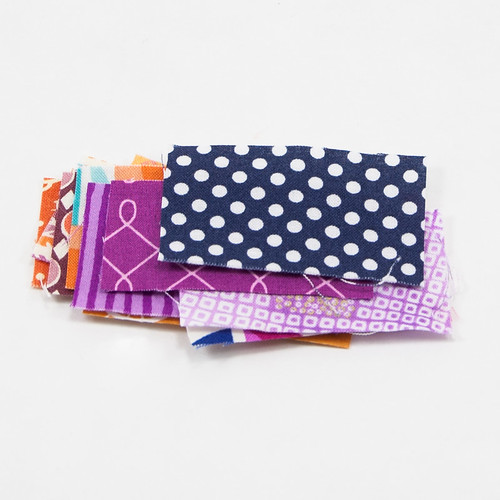
It all starts with a tiny pile of cute fabric.
Roughly 2 1/2″ wide and any heights of your choice. Here’s how I’m choosing to arrange mine.
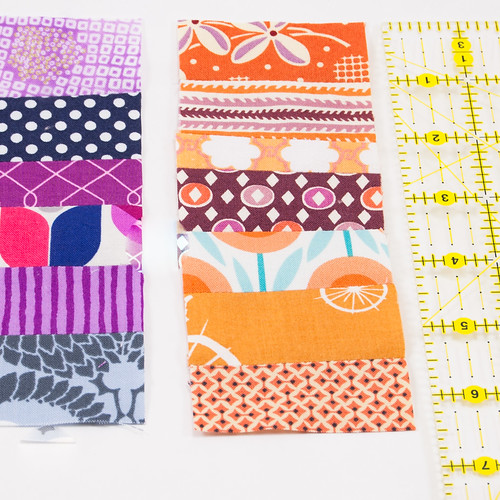
Sew them all up together until you have two strips measuring 2 1/2″W x 6 1/2″ H.
2) Iron open the seams of your patchwork strips
Iron the seams open so that it lies flat, like this.
Constructing the Tiny Protoquilt Top
1) Cut your solid fabric. I am using a strip about 2″ x 6 1/2 on the far left, and a slightly narrower strip between my two patchwork strips. The larger square on the right is about 6″W x 6 1/2 H.
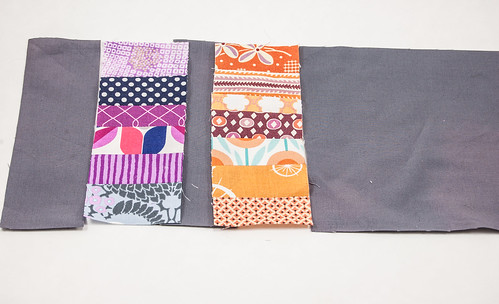
Find the complementing fabric of your choice – a couple of thinner strips, then a larger block that’s about 6″ wide or so.
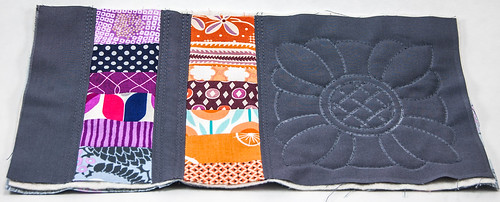
2) Sew your solid strips together with the patchwork strips. Iron the seams so that they are flat.

Put your Bernina to work and sew them all up together!
Construct Your Quilt Sandwich
1) First, fawn over your beautiful mini-protoquilt top!
2) Square up your quilt top, if you need to. (I always need to!)
3) Cut your backing fabric to be the same size as your quilt top

Looking good! Trim everything up to have straight edges, and pick a background fabric of your choice, the same size as your top. I’m using this delicious Amy Butler number.
4) Place the piece of cotton batting between your quilt top and backing. All of the right sides should be facing out, like in the picture below.

Quilt Sandwich time! Find some batting, and cut a piece that fits snugly between your top and bottom.
Start Quilting!
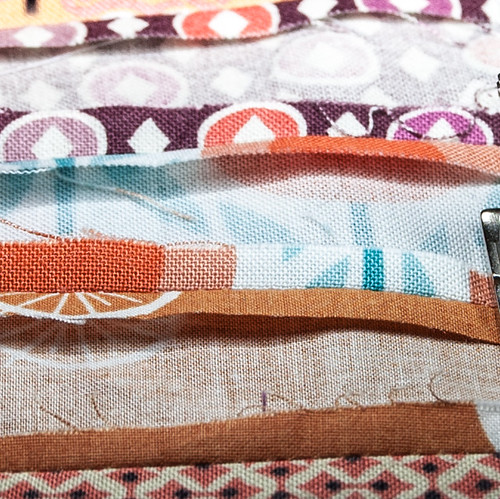
1) In my mini-protoquilt, I’ve chosen to do some straight lines near the patchwork strips. I think that hightlights them nicely.

I like to do two parallel lines of stitching along each patch. I really should be using a walking foot! Please don’t tell the quilting police!
Stencil It Up
1) If you’re choosing to use a stencil, now’s the time to take it out. I found this lovely flower pattern that was both large and relatively simple-looking.
2) If you’ve decided to try out Quilt Pounce, now’s the time to get this out, too.
Quilt Pounce reminds me of a cross between a blackboard eraser and a sponge. It’s hard on top, with a hole for chalk and a cap to keep it all inside. Put the chalk inside the hole, close the top, and tap on a hard surface until chalk starts coming out evenly from the bottom. This could take a while. The bottom is a furry, spongy surface that allows for the chalk to come out. The chalk disappears with a hot iron. It’s like magic.

So, I found this fancy schmancy stencil that I want to put on my tiny protoquilt. There’s a super-easy way to get stencil lines onto your quilt top that is non-staining, and really easy to remove. No water needed! Quilt Pounce is an eraser-like device that has chalk that you put in the top. You gently tap the eraser against something until the chalk comes out the soft other end. Once this is done, you’re ready to go.
3) Place your stencil where you want it on your tiny protoquilt. I’ve decided to put mine on the large square part.
Quilt Pounce recommends wiping the eraser/sponge across the stencil once or twice. Don’t forget to hold the stencil in place, otherwise it’ll move around.
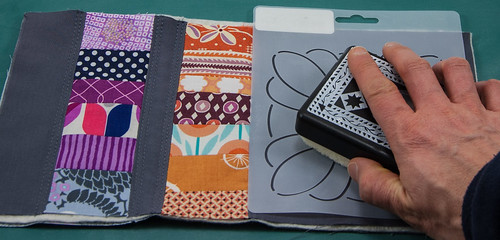
Now the fun part – apply the stencil to the protoquilt! All you have to do is place the stencil where you want it, and wipe the Pounce thingy across the stencil. Make sure to hold on to your stencil, or it will move around! Once this is done, you will have a beautifully-chalked stencil, just waiting for some delightful BSR attention.
4) Remove the stencil and marvel at how easy it was to transfer the stencil design!
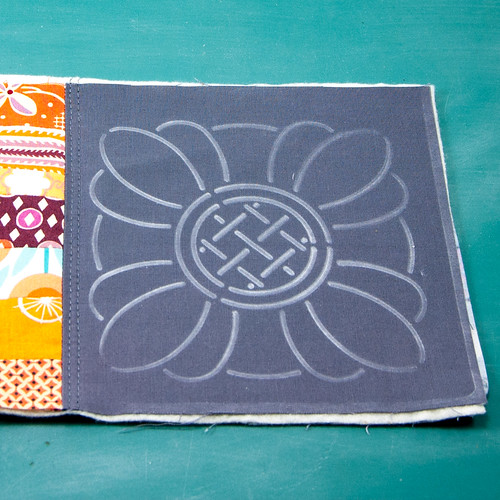
Ta da!! Perfect! (OK, so now what?)
BSR Your Way To Success
1) Get your BSR all set up to run. If you forget how, take a peek at this tutorial.
2) Now simply trace the stencil lines with your BSR and watch as the most delightfully even stitches appear before your eyes. With this stencil, I had to go over some lines twice to get to other parts of the stencil without constantly stopping and starting. I suppose how you decide to do this is up to you and dependent on which stencil you go with!
Tip: Steer clear of the edges when quilting! If you find yourself getting towards an edge, you may notice that the sensor stops working and the BSR gets a little finicky. The light of the BSR must stay on fabric to work effectively. If you run into trouble, simply turn the mini-protoquilt 90 degrees or so that the light is shining ON the quilt (not off the edge) and quilt in a different direction.

Enter the fabulous BSR! Trace the stencil with your BSR. The free-motion part comes in so handy here. Just move your protoquilt underneath the BSR, following the stencil lines. Watch the perfect stitches appear before your eyes.
3) Behold your beautiful work. Square up and trim your edges.
All done! Now what about that pesky chalk? You said it was easy to get rid of? YES! All you need to do is iron it. It disappears. Pinky swear, it really works! It does take several passes. But it works.
Attach the Quilt Binding
1) Take the binding that you either bought or made and attach. This tutorial could be of help if you aren’t sure how to do this! There are loads of video tutorials out there, too, if that’s more your style.
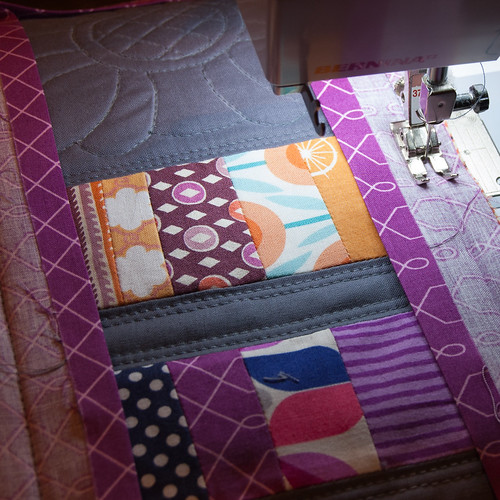
Square up your protoquilt one last time. Find yourself some double-wide quilt binding of your choice, and apply!
2) Iron the finished product to remove the Quilt Pounce and to make sure it’s nice and flat.
Behold Your Finished Tiny Protoquilt!
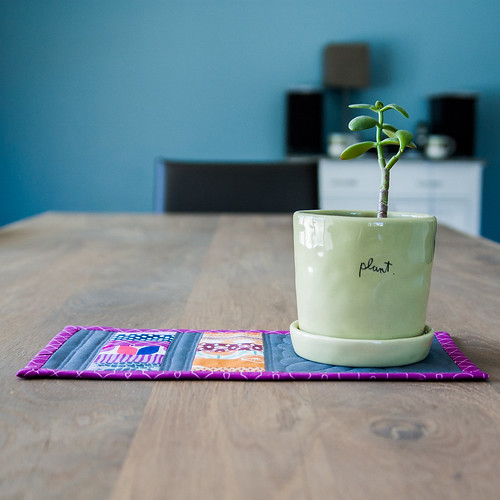
1) Check it out – you finished your mini protoquilt! It’s beautiful! Congratulations!
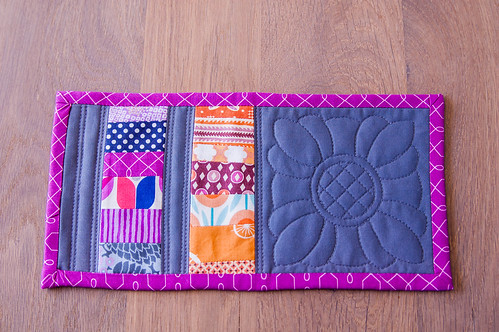
Beautiful! Well done!
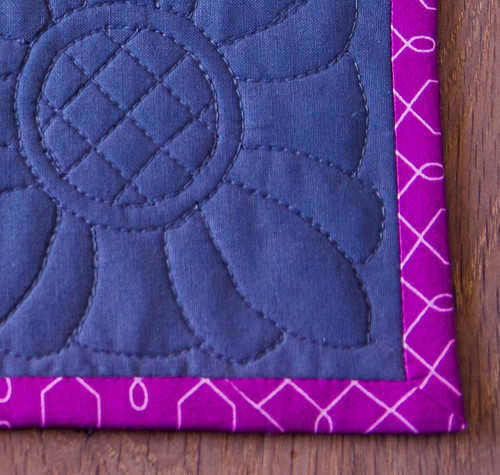
Lovely stitching thanks to the BSR.
Ideas of How to Use Your Mini Protoquilt

Place your delicious morning coffee on your mini-quilt!

Perhaps a resting spot for tea service?
My favorite – a plant rest.
Happy quilting!
Posted by robyn on March 18th, 2015 under bernina 440 qe, crafts, sewing, sewing machines, tutorials8 Responses to “Tiny Protoquilt”
Leave a Comment
Handmade High Tech

I'm Robyn. Thanks for stopping by! This is my craft blog.
Contact me at robyn [at] dognamedbanjo [dot] com.
March 21st, 2015 at 11:47 am
Brilliant way to use BSR!
March 22nd, 2015 at 11:35 am
Thanks, Robin! I hope that it can make a great first project for people. Small, simple and ever-so-useful!
April 1st, 2015 at 6:01 am
Fantastic to see you blogging again Robyn, I’ve really enjoyed your previous posts, inspired me to purchase a new-to-me 440QE which I absolutely love!
Have you tried the piping foot yet?? It’s fabulous!
Hope you are ok and will keep posting every now and then, we really appreciate your thorough explanations and photos.
Best wishes
June 1st, 2015 at 5:51 am
Hurray! It’s so good to read you again! Your previous posts on the 440 were so helpful. I still have my baby, but now have the Mamma B780. I liked your little mug rug. Good idea to use some bits and pieces of Japanese fabrics.
November 12th, 2016 at 6:27 pm
love it
September 12th, 2020 at 11:55 pm
первостатейный ресурс https://1xbetstavkionline.ru
September 25th, 2020 at 7:09 pm
view it кардинг форум
October 17th, 2020 at 5:48 am
Fachmannisch von
mostbet und pedantisch eine Bewertung von aller Qualitaten zu machen, konnen Sie kompetent alle Vor- und Nachteile benennen. Breit Sortiment der erstaunlichen Spielautomatik.